Database Schema in SQL Server
In SQL Server, a schema is a logical collection of database objects such as tables, views, stored procedures, indexes, triggers, functions. It can be thought of as a container, created by a database user. The database user who creates a schema is the schema owner.
- A schema can belong to only one database whereas a database can have one or multiple schemas.
- There are no restrictions on the number of objects in a schema.
- SQL Server provides us with a few built-in schemas such as dbo, guest, sys, etc.
- A database schema can be owned by a database role or an application role along with the database user. They are called schema owners.
- dbo is the default schema for a newly created database.
- Schema ownership can be transferred from one user to another user in the same database.
- A database user can be dropped without dropping the database objects owned by the user. But the schema cannot be deleted if it owns database objects.
Create Schema Using T-SQL
A schema can be created using T-SQL.
CREATE TABLE hrdbo.Consultant
(
    ConsultantID int,
    FirstName nvarchar(50) NOT NULL,
    LastName nvarchar(50) NOT NULL
);
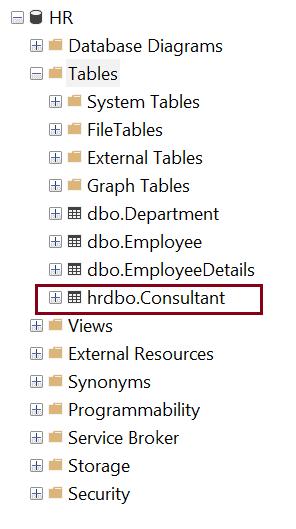
The above will create a new table Consultant in the hrdbo schema, as shown below.
Modify Schema
Use the ALTER SCHEMA statement to transfer database objects from one schema to another schema in the same database.
ALTER SCHEMA <schema_name>
TRANSFER [entity_type::]securable_name;
In the above ALTER SCHEMA syntax:
schema_nameis the name of a schema in the current database, into which the securable (table, view, stored procedure, etc) will be moved.entity_typecan be Object, Type or XML Schema Collection.securable_nameis the name of db object (table, view, stored procedure, etc.) to be moved into the specifiedschema_nameschema.
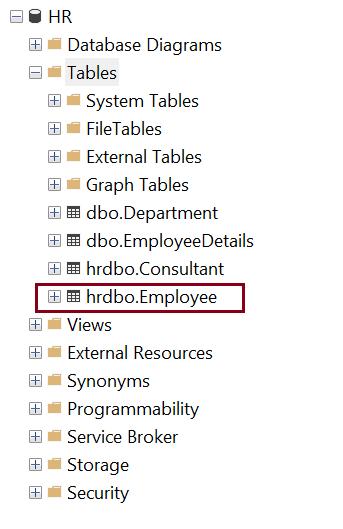
The following transfers the Employee table from the default dbo schema to hrdbo schema.
ALTER SCHEMA hrdbo
TRANSFER OBJECT::dbo.Employee;
The following shows the hrdbo.Employee table.
Note: You can use ALTER AUTHORIZATION statement to change the owner of the schema as shown below:
ALTER AUTHORIZATION ON SCHEMA :: hrdbo TO dboDelete a Schema
DROP SCHEMA deletes a schema from the database. The schema that is being dropped must not contain any database objects. If the schema contains objects, the DROP statement fails.
DROP SCHEMA [IF EXISTS] schema_nameThe following statement deletes the hrdbo schema provided no objects in that schema.
DROP SCHEMA IF EXISTS hrdboCreate Schema Using SSMS
A schema can also be created in SSMS tool.
Step 1: Open SSMS and connect to the database.
Step 2: In the Object Explorer, expand the Databases folder and expand the instance of the database where you want the new schema to be created.
Step 3: Right-click on the Security folder and select New -> Schema, as shown below.
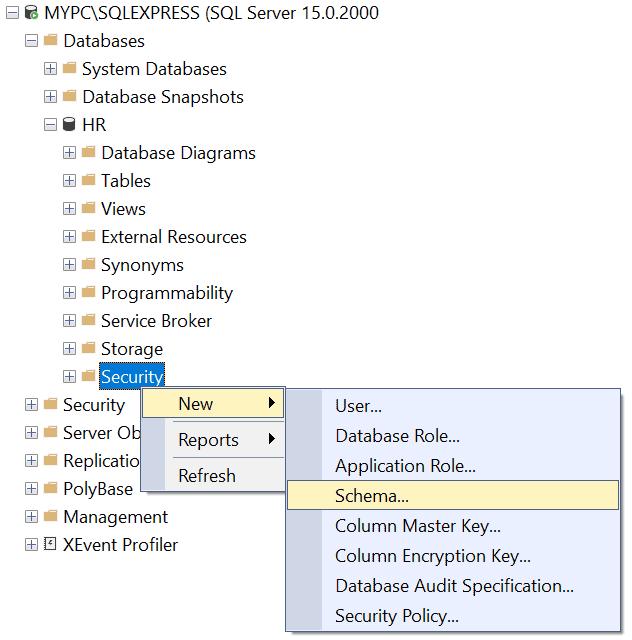
This will open the Schema New dialog box as below. On the General tab, enter the new schema name and Schema owner, as shown below.
The Schema Owner can be the name of the database user or role which will own the schema. Or to select a User/Role, click on the Search button.
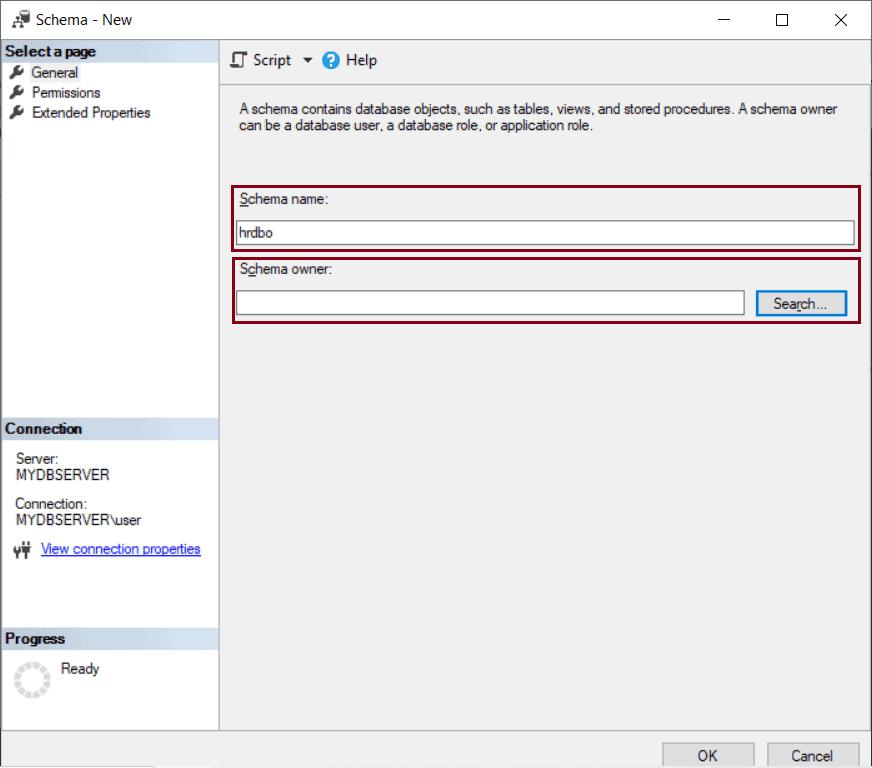
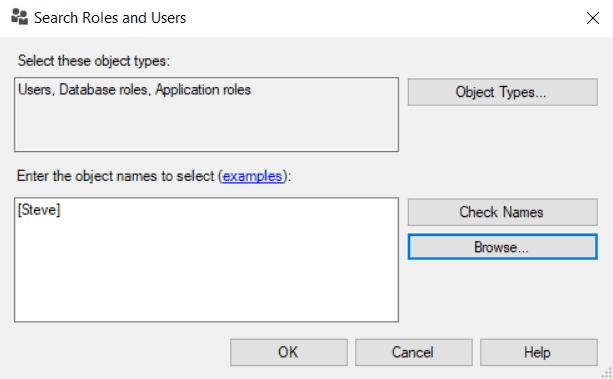
In the Search Roles or User dialog box, click on the Browse button and select a User to whom you want to make as the owner of the Schema. Click Ok.
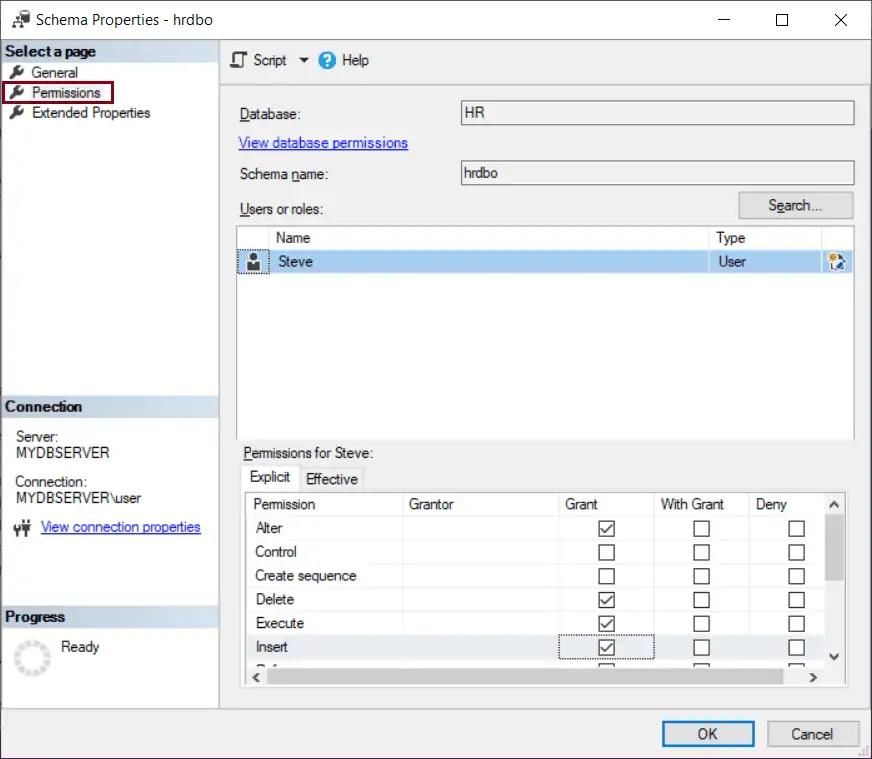
Step 4: Click on the Permissions page to see the lists of all the securables and the permissions on those securables that can be granted, as shown below.
Step 5: In the Extended Properties tab, you can add customized properties to store additional information. Every extended property has a user-defined name and value. It is used for adding comments for a database object, as shown below.
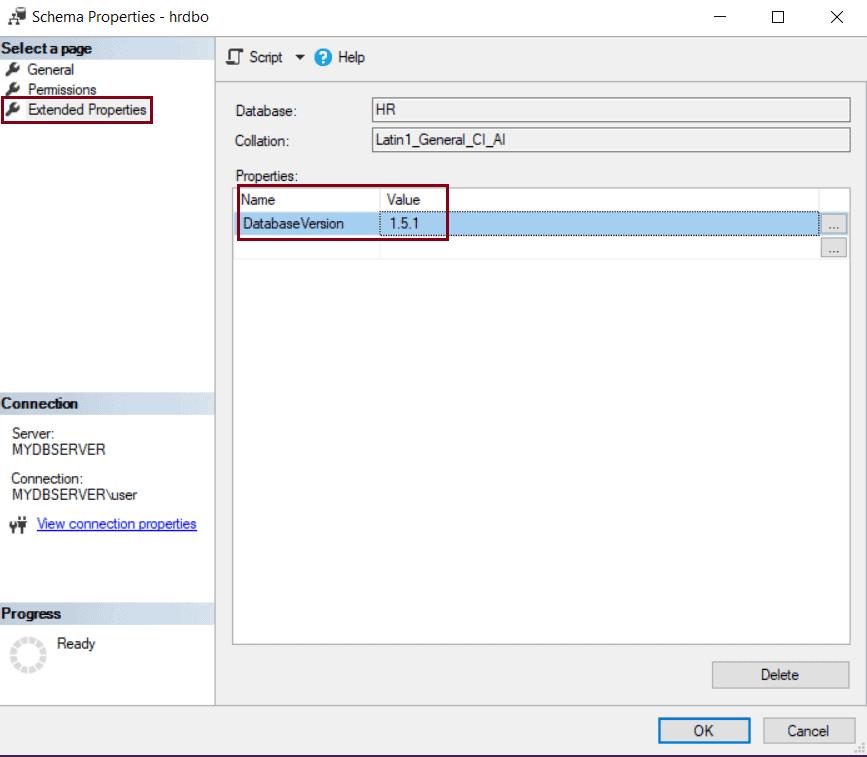
Extended properties can be used to store version information, tooltips for user interfaces, data lineage information, descriptions of columns, and many more.
Step 6: Click OK to create the schema and save it.
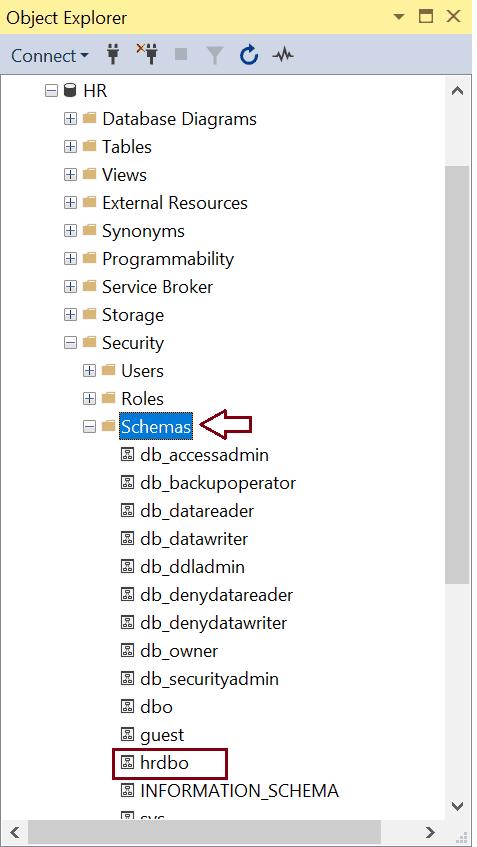
Step 7: Refresh the Database instance tab. The new schema is created under the Security -> Schema folder, as shown below.
Thus, you can create, edit, delete database schemas using T-SQL and SSMS.