Sass Syntax
Before we write any Sass code, let's learn the basics of Sass syntax.
Sass File Types
The Sass transpiler supports two different file types: .sass and .scss - each with its own extension and syntax. Prior to version 3, Sass files used the .sass extension, and used an indented syntax similar to haml. In version 3, Sass introduced the .scss format ("Sassy CSS"), which is much closer to CSS proper.
Although .sass files are still supported, we'll be using the newer .scss format in this tutorial. If you're comfortable with haml and want to explore the older syntax, learn .sass syntax on Sass Documentation .
There's even a sass utility that will convert from one syntax to the other. Just use the sass-convert command in the command prompt on Windows or Mac as shown below:
Use following command to convert .sass to .scss.
sass-convert style.sass style.scss
The following command converts .scss to .sass.
sass-convert style.scss style.sass
SCSS Syntax
The basic structure of the scss syntax of Sass is identical to CSS. Everything you already know about how to write a CSS rule still applies. In fact, you can pass straight CSS to the Sass transpiler and it will work without a problem.
But Sass does extend CSS syntax in some important and useful ways. As always, these extensions don't add any new functionality to CSS, just make it easier to write, and they'll be translated into pure CSS by the transpiler. We'll examine the important extensions in the rest of this chapter.
Inline Comments
As we've seen, Sass supports standard CSS syntax, and that includes the CSS comment syntax:
/* Text color for alert messages */
.alert {
   color: red;
}
But Sass also supports inline comments, which can be useful for (among other things) documenting individual properties within a rule:
/* warning color pulse */
.warning {
   animation: warning-pulse 5s infinite; //pulses red to yellow
}
There's an important difference in the way Sass handles traditional CSS comments that use the /* comment */ syntax and inline comments that use the //.
The /* */ CSS comments are passed through to the output file intact, but inline comments // are removed. What this means in practice is that you can avoid cluttering up the CSS with Sass-specific comments that would only confuse someone reading the final style sheet.
Nested Rules
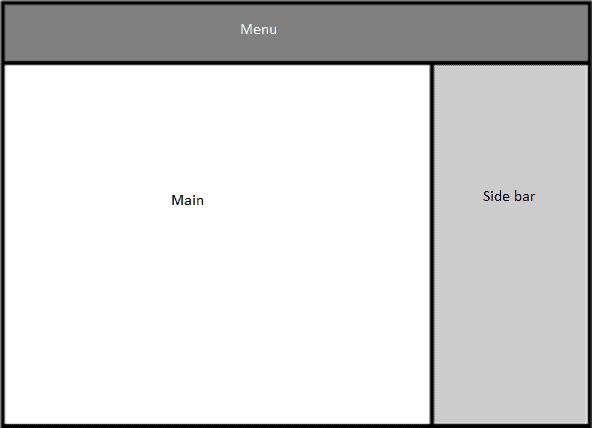
Many web pages are laid out in "zones" with different styling. The illustration below shows a common layout, with a menu area, a side bar, and a main content area.

The main html page for a layout is normally set up using div elements with an id attribute.
Within the CSS, you would then use the #id to style the elements within each zone:
#main {
    //#main general rules
    ...
}
#main p {
    //rules for <p> elements within main
    ...
}

#menu {
    //#menu general rules
    ...
}

#menu ul {
    //rules for <ul> elements within main
    ...
}
Sass provides a cleaner solution: You can nest selectors. Your code can look like this:
#main {
    //#main general rules
   p {...} //rules for <p> elements within main
   //more #main general rules
    ...
}

#menu {
    //#menu general rules
    ul {
        //rules for <ul> elements within main
        ...
    }
}
Even with an example this simple, you can see that the CSS is a little cleaner and easier to read. The example shows the general rules for the #main element split, with the p rules separating them. This is perfectly valid Sass syntax, but it's not best practice-splitting the rules like this makes them easy to miss.
Parent Selectors
The nested selectors that Sass provides can save a lot of typing and clarify your CSS, but there are some situations that can't be handled by simple nesting.
Take for example the a:hover pseudo-selector. :hover by itself isn't valid CSS (or Sass), so despite how readable it is, you can't write:
a {
   color: red;
   :hover: green; //this isn't valid
}
Enter the Sass parent selector &. Using a parent selector and Sass nesting, you can write:
a {
   color: red;
   &:hover: green;
}
The Sass transpiler will convert this to valid CSS:
a {
   color: red;
}

a:hover {
   color: green;
}
The Sass parent selector can be used anywhere you would normally type a selector keyword, but it must be at the beginning. That is, &:active p {...} will work, but#main &p won't.
But because the parent selector works in some ways like a simple text substitution, there's one more trick you can do using it. Say, for example, you have HTML like this:
<div id="main">
    <div id="main-header">

    </div>
</div>`}
                </CodeExample>
    <p>
        Using the parent selector, you can use the parent selector to nest the CSS rules:
    </p>

    <div className="card code-panel">
        <div className="card-header example-header"><div className="example-caption">SCSS: </div><button className="copy-btn pull-right" title="Copy example code"><i className="fa fa-copy"></i> Copy</button></div>
        <div className="panel-body">
            <pre className="csharpcode">
<code>#main {
   ...// general rules for the #main div
   &-header {
      ...//rules for the #main-header div
   }
}
Nested Properties
Sass provides one more CSS extension that will save you typing and make your code more readable: nested properties. There are groups of CSS properties that have the same prefix, such as font-family, font-size and font-weight or text-align, text-transform and text-overflow. Sass allows you to treat them as nested rules:
font: {
   family: serif;
   size: 30rem;
   weight: bold;
}

text: {
   align: center;
   transform: uppercase;
   overflow: hidden;
}
The Sass transpiler will expand these nested rules into normal CSS:
font-family: serif;
font-size: 30rem;
font-weight: bold;

text-align: center;
text-transform: uppercase;
text-overflow: hidden;
If the prefix is a rule in its own right, as with font, you set that property before the opening braces:
font: serif {
   font-weight: bold;
}
This syntax results in slightly more concise CSS, but at the cost of readability.