Target Multiple Frameworks in .NET Core 2.x App
As mentioned in the previous chapter, creating a .NET Core application which targets multiple frameworks is one of the approaches for code sharing.
We can create .NET Core application and configure multiple target frameworks for it so that it can run with all the configured target frameworks. To demonstrate this, let's create .NET Core 2.0 console application which can run with .NET Core as well as traditional .NET framework in Visual Studio 2017.
The first step is to create a new project in Visual Studio 2017 by clicking on File -> New Project.. This will open New Project popup as shown below.
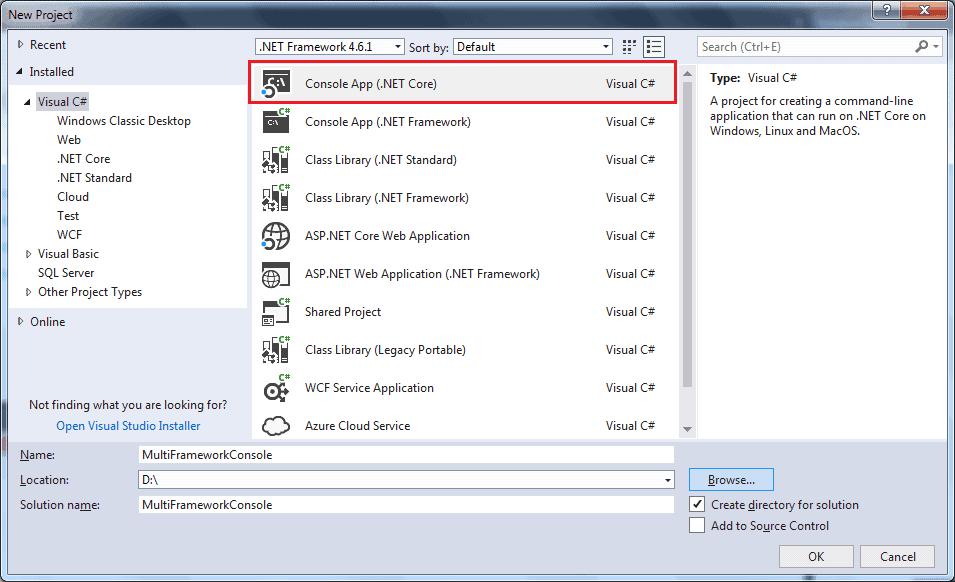
In the New Project popup, select Console Application (.NET Core), provide the appropriate name and click OK. This will create new console project as shown below.

Now, we can configure multiple frameworks by editing .csproj file. So, right click on the project in solution explorer and select Edit <project-name>.csproj as shown below.
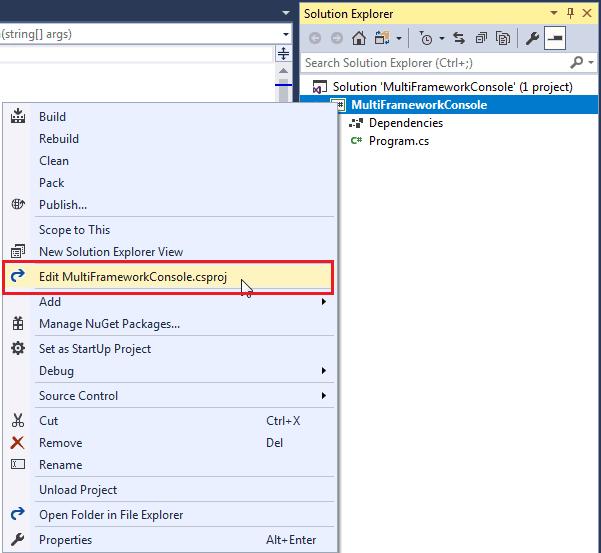
The .csproj will look like below.
<Project Sdk="Microsoft.NET.Sdk"><PropertyGroup><OutputType>Exe</OutputType><TargetFramework>netcoreapp2.0</TargetFramework></PropertyGroup></Project>As you can see above, <TargetFramework> is netcoreapp2.0. It means currently this application can run on .NET Core 2.0 framework. We can include multiple monikers for multiple frameworks here, in order to target multiple frameworks.
To target multiple frameworks, change <TargetFramework> to plural <TargetFrameworks> and include monikers for different frameworks you want to target separated by ;.
Here, we will support two more frameworks .NET Framework 4.0 & 4.6. So include net40 and net46 monikers respectively as shown below. Look at TFMs for all supported target frameworks here.
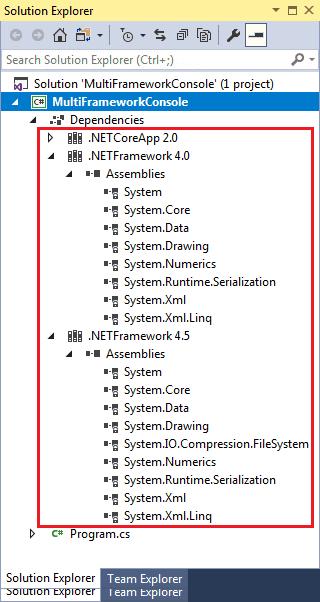
<Project Sdk="Microsoft.NET.Sdk"><PropertyGroup><OutputType>Exe</OutputType><TargetFrameworks>netcoreapp2.0;net45;net46</TargetFrameworks></PropertyGroup></Project>As soon as you save the above .csproj file, Visual Studio will load and include the references for .NET 4.5 and .NET 4.6 into Dependencies section as shown below.
Now, open program.cs and let's add framework specific code using preprocessor conditions #if and #elif as shown below.
using System;

<span className="kwrd">namespace</span> MultiFrameworkConsole
{
    public class Program
    {
        public static void Main(string[] args)
        {

#if NET40
        Console.WriteLine("Target framework: .NET Framework 4.0");
#elif NET45
        Console.WriteLine("Target framework: .NET Framework 4.5");
#else
        Console.WriteLine("Target framework: .NET Core 2.0");
#endif
        Console.ReadKey();
        }
    }
}
As you can see above, to write framework specific code, use symbol with condition for .NET framework moniker and replace the dot with an underscore and change lowercase letters to uppercase.
To run the application for specific framework, click on the run dropdown and select a targeted framework as shown below.
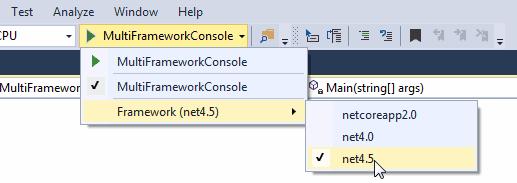
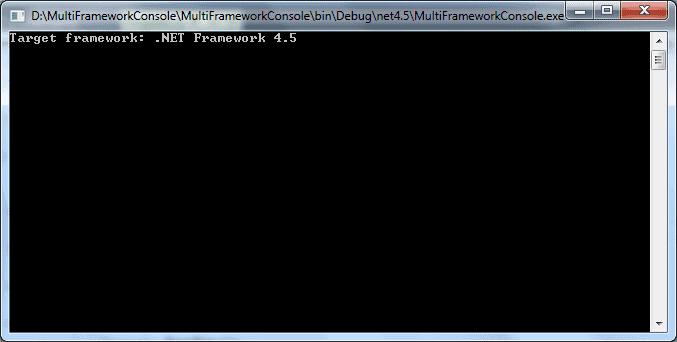
Now, run the application and you will see the following output.
Framework Specific References
Sometimes you may need to include specific references for a particular framework. For example, .NET Core 2.0 meta package already includes System.Net reference which is not included in .NET 4.0 and 4.5. So, we need to include it in .csproj file using conditional reference as shown below.
<Project Sdk="Microsoft.NET.Sdk">

  <PropertyGroup>
    <OutputType>Exe</OutputType>
    <TargetFrameworks>netcoreapp2.0;net45;net46</TargetFrameworks>
  </PropertyGroup>

<ItemGroup Condition=" '$(TargetFramework)' == 'net40' ">
    <Reference Include="System.Net" />
  </ItemGroup>
  <ItemGroup Condition=" '$(TargetFramework)' == 'net45' ">
    <Reference Include="System.Net" />
  </ItemGroup>

</Project>
Now, System.Net reference will be added to .NET 4.0 & 4.5 and System.Net specific code will be executed for all frameworks.